Kamis, 08 Agustus 2013
Selasa, 06 Agustus 2013
It's alive , alive!!!!! Video time....
Senin, 05 Agustus 2013
Best week ever!
Good Monday to you all! Wow, it’s been a total whirlwind of a week! I’m not sure I’ve ever packed more into seven days in my life.
Bear with me as I share a little bit of it with you today – it’s been an wonderful, overwhelming, lovely week and it really couldn’t have gone much better!
First up – Haven 2013! For those of you who don’t know, Haven is a conference dedicated to DIY and decor bloggers specifically. It’s the first of it’s kind because we (the team) knew there was a need for it – and a few years ago we decided it was time to make it happen!
This was our second year and it was even better than the first!:
This is about half the group – all together we had about 450 attendees (that includes sponsors) so it was much bigger than last year. I’m not sure we’ll go too much bigger because we love the feel of this size – we still want everyone to feel like they have a chance to meet most everyone.
It was just a great week, really. We were just so happy with how it all turned out and are all so thrilled and humbled by it all! There was a lot of learning – I have a HUGE to do list written down – but most of all it’s just so amazing to hang out with people who totally get what you do.
We goofed around plenty:
It’s hard not to with these ladies. I laughed, a LOT. ;)
But most of all, like always, I walked away having learned so much from just chatting with other bloggers throughout the week. I was so happy to see old friends:
And meet plenty of new ones, even though I’ve “known” them for years:
As always, I didn’t get nearly enough pictures. I know took one with many of you and I’d love a copy! (Or we have a 2013 Flickr account going, so you can load them there!)
It was an honor to have been a part of it again this year and to work with some amazing women:
Our event planner, Kristin, isn’t in that pic but she is a rock star – there is NO way we could do this without her.
Next year’s conference is already booked for July in Atlanta! We’ll share details soon. :)
So I got home from the conference, slept for a few hours and then moved on to the next adventure…the NKOTB concert:
I know I’m a little teensy bit biased, but DANG, they put on a great show! I was exhausted just from attending.
This time they were joined by Boys to Men (they were fantastic!) and 98 Degrees and the place was packed!:
It is absolutely electric. And LOUD. Grown women can SCREAM.
My hubby’s cousin hooked us up with some incredible seats – six rows off the floor:
We had one of the best views there! Excuse my Farah hair by the way. I’m bringing the 70’s back. Apparently.
Yet again, I came home, got a few hours of sleep and then this morning we were up bright and early for a very special appointment.
Today we learned we’ll soon have a grandson. :) Yes, I’m going to be a grandma – my stepdaughter (23) is due in December and we found out this morning it’s a boy. It was very emotional and sweet and they had a room full of family and friends there to find out the big news. Our son is THRILLED. :)
We are just so happy she and the baby are healthy and doing well. I haven’t mentioned it yet just because I kind of feel like this is their story to tell, not mine. I will of course share more as we get closer to the due date and will most likely share a few pics over time, but I want to respect their privacy and desires too.
I can’t wait to meet this sweet boy!!
So, yes, I think I will set some kind of record as the youngest grandma ever. Especially being 27 and all. Or something.
Well…there’s my week in a nutshell. See, a little crazy huh? But every bit of it makes me so incredibly thankful – I am so grateful for this life I live. I am a lucky woman. A lucky woman who is off to take a nap for six hours or so. ;)
Sabtu, 03 Agustus 2013
Jumat, 02 Agustus 2013
July in review and no-spend August
Hello everybody, happy Friday to you! I hope you’ve had a great week – I’m still at the Haven Conference and having a blast! Well…I hope I am anyway. I wrote this before I left. ;)
I’ll be back next week with some more DIY, but for now I’m reviewing the big posts from July and I have a fun little announcement at the end that I’m getting excited about. :)
First up last month I shared how I tackled my first true floating shelves:
These are great storage for some of the Bub’s Lego sets – I love having them on display but these also get them out of the way.
Next I shared the details on the powder room redo:
I covered the sources and details for everything in the room, so if you had questions on anything it should be answered there!
I did a little organizing (and prettifying) in the dining room – those skinny little cabinets hold a TON of stuff:
I’m so glad I decided to incorporate that closed storage in the built ins!
I shared more about our latest RV trip and the little cabin in the woods that we stayed in:
Many of you asked the name of the cabins/RV park and it’s called Neshonoc Lakeside in LaCrosse Wisconsin. :)
Next up I showed you a FUN new DIY product – painters tape that comes in shapes!:
This is the first chevron in our house and it may be the last. We’ll see – I’m still not hooked. I do like this little touch of it though. It’s staying for awhile at least!
Next up I hope to use the wave version of the shape tape. ;)
I shared my plan for our mud room redo in this post, including some lovely inspiration pics:
Drool.
I was busy working on our master bedroom in July and I shared more about our new bed here and the how-to on the tufted headboard here:
I’ve made a few more changes in there since and I’m SO pleased with how the room is coming together! Our bed is still my favorite part. ;)
Last week I shared the ways I deal when cash is low. I’ve learned over the years it’s a horrible feeling and I’ve always had a few tried and true methods to keep my spirits up:

This week I shared how I’m not killing my hydrangeas anymore:
I’ve made a concentrated effort to learn more about them and it’s paid off!
So I’m excited about August! This month I’ve decided to do another “no spend” month. I first did this a couple summers ago and actually quite enjoyed it! I have so many projects that need to be finished up, so many spots that need decluttering, and I just enjoy trying to work with what we already have.
So this month I won’t spend any cash on DIY or decorating projects. I have one that we’ve scheduled that will probably happen, more on that later. But otherwise I hope to stick to only what we’ve got! I hope you’ll be inspired!
Take care all and have a great weekend! :)
*P.S. As soon as I get back from Haven we head out for the NKOTB concert.
AWW. yeah.
Can’t wait!!
Kamis, 01 Agustus 2013
Rabu, 31 Juli 2013
Staircase nook
Hey hey all! Well, it’s about that time! I’m off to Atlanta today to prepare for the Haven Conference that starts tomorrow. It’s been a year of planning and I can’t even believe it’s already here! SO excited to see everybody.
So I finished up a quick little project this week that I’ve been meaning to do for months. Or a year. A year and a few months.
We have a little ledge/nook/cut out spot in the basement staircase that has been sitting half way done for that year and a few months:
You may remember that I installed a wood wall on the main wall in the staircase about this time last year. I still LOVE that wall. So very much.
Before we had the basement finished the wall next to it going down the steps had a weird cement wall bump out thing. Instead of drywalling all the way up I asked them to make it a little ledge instead. They installed a wood piece that I was planning on painting later, hence the stain spatter I didn’t worry about:
But since then I’ve decided I wanted it stained instead. I’m kind of obsessed with the look of the dark wood against the gray blue walls (Marina Gray by Ben Moore) and white trim down there.
So I needed to sand off that stamp and the stain dots:
It just took a few seconds and I was ready to go – then I taped everything off with my Frogtape really well. I find it’s hard to keep stain from going everywhere since it leaks easily and spatters all over the place. (It could be the operator, who knows.):
After I wiped everything down well (and let it dry), I grabbed my dark walnut stain and went at it:
Remember when you stain to work quickly and to keep the “wet edge” – if it dries at all during the process you’ll see where you left off. OH, and wear gloves!! Trust me – no matter how hard I try I always end up with stain on my hands.
I let it sit for a few minutes and wiped the excess off. I only usually do one coat – I find that’s plenty for the color I want.
While it dried I started hanging the frames I’ve had leaning there forever. Most of them are pics from the Macy’s Thanksgiving parade/NYC trip I showed you here, but there was one collage my stepdaughter gave us last Christmas (so sweet!) that I wanted to include too.
Here’s a little tip when hanging pics that have two hangers instead of one – just tie a piece of string or wire between the two:
Then hang that on the the nail. SO much easier. I mean, sometimes what you’re hanging is heavy enough you’ll want two nails, but most of the time I find one is just fine. And this way you don’t have to worry about measuring, finding a level, all that stuff. Ain’t nobody got time for that.
Like all of my gallery walls, I just kind of put stuff here and there – yes, that meant a few extra holes in the wall but they’re tiny. The wall will survive:
I was trying to use frames that I had on hand and I liked the (mostly) matching frames, so I didn’t go crazy trying to fill empty spaces. The “S” we’ve had for years and it perfectly filled one spot that was bugging me.
The ledge has plenty of room for accessories, but for now I just left a couple candlesticks we had here before (they ended up on there because I was too lazy to take them all the way to the storage room):
They are fake candles and they operate on a timer, so it’s kind of cool to have that little glow as we walk down at night.
It was a quick project and I think it turned out pretty cute! I love how it looks with the planked wall:
Next up in this space – touch up the wall and ceiling paint and install chunkier baseboards. Maybe I’ll tackle those in another year. Baby steps.
So are you loving gallery walls? I am and I don’t think they’re going anywhere soon. It’s such a personal, easy way to fill wall space! And remember you can find frames at Goodwill for super cheap and spray paint them. One color for all of them will unify frames no matter their design.
Selasa, 30 Juli 2013
When Is It The Right Time To Change Management Jobs?
Shocking Employee Feedback
Strategic Way to Implement Virtual Change
2) Analyze results and develop plan
3) Implement change
4) Evaluate implemented change
5) Post-change support and maintenance
Writing Standard Operating Procedures
Firstly, you need to consider who your team of two will be. Please make it someone who is going to use the instructions. Many businesses use one team to write the instructions and a different team to execute the instructions. In some cases this may because of the technical knowledge required to define the optimum sequence of the steps. Having someone in the background to verify the steps from a technical perspective can help negate this issue. The real power of engaging with the people who perform the tasks is exactly that - engaging. There are many benefits to helping your staff to engage more with the business, but defining the best way to perform their tasks is a great way to do it. If the people who perform the task write the SOP then there will be a better chance that the process is adhered to (providing it is technically correct of course).
Next, having two perspectives can bring with it greater insight. When you get one person to write the SOP you get one point of view. There may be a number of different ways to complete a task and the question then becomes 'what is the best way?' Of course if the SOP becomes a contentious issue it might be necessary to go back to the entire team with the various proposals for the best process, but it rarely gets this far in most cases. Having two people combine their skills and knowledge into one instructional document therefore can help you define the best possible sequence of steps. In your quest to develop processes that are as good as they can be this is a great opportunity.
Thirdly, when you have a small team (of two) writing your SOPs there is another opportunity with regards to day to day working. SOPs are great as long as they are being followed. When they sit on a shelf and aren't being acted upon then their worth is minimal. People seem to have a natural tendency to adjust and deviate from the original process steps over time. Whether this is due to an increased workload and people are trying to find a shorter route, or whether there is a lack of understanding, deviation needs to be controlled. Making SOPs part of the working day is one of the 'close out' tasks of creating SOPs. The team you choose to write the SOPs need to be conscious of integrating SOPs with working life. Making them accessible and part of the day to day working (standard meetings, timetables etc...) is vital to make the instructions work.
Standard Operating Procedures can be wonderful tools or a burdensome admin task. Getting a team of two to inject reality and optimisation into your instructions can give them a boost. Helping your team to follow a single best way of working can bring tangible results to your business and should not be underestimated. Getting the instructions to become part of the day to day and not rot on a shelf (or hard drive) is paramount if you want results. Engaging with your team via this practical writing approach can make a real difference and I urge you to review the state of SOPs today.
Four Things To Consider When Looking To Rent Office Space For Your Business
While corporate growth is never a bad thing, it's important to note that it does come with a few byproducts that warrant consideration. Things such as adding staff to manage more clients and even expanded core competencies to ensure customer satisfaction usually come into play as a business broadens its reach. What's another important factor to consider as a company extends its operational empire? Office space.
Understanding The Key To Successfully Sourcing The Right Office Space For Your Company
Whether moving out of a home office space, or looking to move from one corporate building to another, finding the right leasing options for any company can play a key role in the ultimate success of an organization. If you're currently considering sourcing new office space options for your thriving company, it's important to keep these four critical factors in mind to ensure that your company's new home feels like a perfect fit.
Set your budget: Leasing office space should be much like purchasing a home or renting an apartment -- you need to have a firm grasp on what you can afford before moving forward with the search. Analyze your cash flow to determine how much more you can comfortably spend on your corporate leasing upgrade while still having the liquidity to conduct business as usual.
Square footage: All too often, corporate leaders of growing organizations assume that their expanding companies will continue to do so indefinitely. The result? They lease office space that eventually proves to be far too big for their needs. Carefully strategize your expected growth over the length of your proposed lease to find a place that suits your needs now and gives you needed room to grow without costing you too much in potentially wasted square footage.
Think location: Every business region has a corporate location hub where businesses thrive. Where's yours? Once you have an answer to this question, this is the area you localize your search to ensure that your business has easy access to clients, major highways and an extensive range of other features and perks.
Shop around: Don't just settle for the first leasing option you find to simply be done with the search process. Yes, walking through multiple buildings can take up time and feel overwhelming; however, the payoff is more than worth it. Being able to compare floor plans, building amenities, lease plans and other benefits is the only way for you to make an informed final decision that truly enhances your organization's operational abilities.
Keeping these four important considerations in mind when sourcing viable office space for your company can help ensure a seamless move that effectively helps you broaden your business empire!
If You're The Independent Contractor Are You Liable - Or Are They Liable?
In English law there is something called "vicarious liability" specifically where specific standards have to be satisfied in establishing whether an individual organisation is really liable for damages or otherwise. Basically it's been determined that personnel of an organisation may be included in their own employer's liability, as they were carrying out work "under the direction" of the employer when performing the assignments, if this should lead to an accident of some sort.
Typically the part that has particular significance to the 3rd party contractor is usually that terminology alone is not going to necessarily provide protection. As an example, although you may call yourself some sort of freelance contractor and you have signed a legal contract saying so together with another company, the legal court could find differently in some instances.
Within the case generally known as Ferguson versus John Dawson and Partners [Contractors] Limited, 1976, it was subsequently revealed that a certain point of control was there concerning the agency and the actual freelance contractor. Quite simply, specific factors represented the relationship was definitely one of employee - employer, instead of what was initially indicated.
All of it comes down to control. Accountability may be enforced if an employer dictates precisely what work has to be accomplished and precisely how it must be done. If particularly explicit instructions are given through the organisation itself to the freelance contractor this tends to symbolise a clear causal link should any incident lead to harm on the whole.
As a result, pay very close attention to the actual fine print imposed by the company you sign into any contract to serve. If perhaps it seems very micro-managerial in essence then it could be considered as, basically, an employee - employer association.
Hunt for the best independent contractor services that you can secure and additionally ask these folks for their respective advice pertaining to the actual terminology and wording as part of your long term contracts. You have to be very straightforward about the arrangement from the standpoint associated with liability, to be able to get the proper sort of insurance protection and to govern yourself correctly. Similarly, you ought to be sure the enterprise you do business with is entirely sure on their position. You could point out that it is all fine and dandy to be "covered" by their insurance policies in case there is a mistake of some sort, but this sort of uncertainty or confusion may lead to major problems down the line and may also result in a breaking down of any relationship between both of you. This is why it's best to pay especially close attention to virtually all elements of any agreement you enter into and to be clear on your role as well as potential events in the foreseeable future.
Legislation is a fluid thing and generally there are repeated tests of an employer - employee connection and the actual standing associated with the independent contractor. As a result, only work with businesses that present you with independent contractor services in which they stay in touch with these "potential tests" and understand how regulations might or might not be in process of change.
In The Matter Of Taxes, Be Sure That It's Fair And Reasonable
Senin, 29 Juli 2013
Growing hydrangeas (not killing them)
Hey heyyyy! How was your weekend? Have I mentioned how wonderful our weather has been? One or 50 times? Yeah. It’s been awesome. 51.
I’ve been spending SO much more time outside this summer, I’ve truly enjoyed this season. I’ve been planting a bunch of new things, transplanting some, just enjoying our outdoor space and the flowers.
I wrote last summer about my pathetic hydrangeas and how I was the pretty much the worst hydrangea parent EVER. They hated me. I’ve learned a ton about them since and figured I’d share my new knowledge. (So many great tips in the comments of that post!)
Mine still have a long way to go, but I as long as we don’t have a scorching summer next year, I think they’ll do even better. It’s SO exciting to see them actually grow and bloom this summer! Seriously a thrill after I’ve worked so hard to help them along.
They were sad and pathetic last year, really. The biggest surprise I got a few weeks ago were the start of blooms on my limelight hydrangea. I’ve had it three years people – not one bloom till now. Here is was last summer and now:
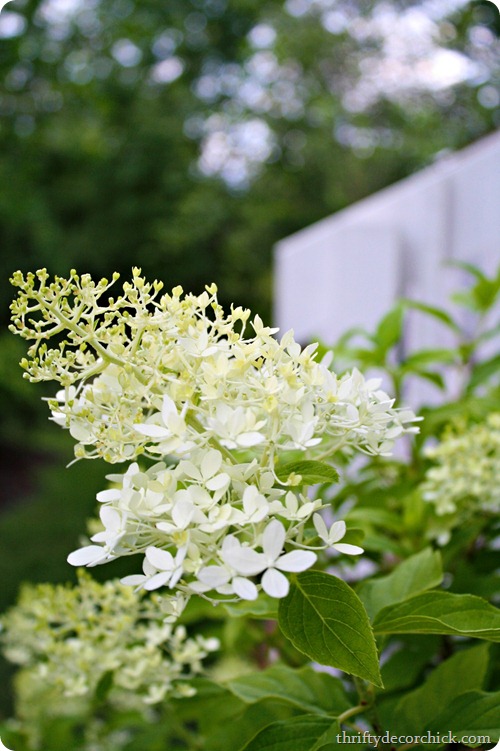
It’s now FILLED with beautiful white blooms! They’re all only about half way done too, so in a week or two it will be full of puffy white flowers:
So here’s the first piece of advice – the sleep, creep, leap saying is true. Most plants I have planted follow this – the first year they don’t do much, the second the come along a little bit and the third they leap! I got this guy on clearance at the end of the season two summers ago and last year you can see that it grew, but didn’t do much else.
The third year (this year), it has doubled in size and is full of blooms. I think with hydrangeas you just need to have patience. Which is hard when you buy one full of blooms and then it poops out on you.
Here’s another biggie – you will see hydrangeas everywhere in full sun all the time – I see them at restaurants, stores, churches, drive throughs – everywhere. But mine did horribly in full sun:
I showed you these last summer – I’d had them for two or three years at that point? Not one had ever bloomed, they all barely grew, it was just sad. Sad sad SAD.
Now those three look like this:
The one on the left has grown a TON from where it was (it was the smallest one) but it’s still not blooming. The other two have done great! They just don’t have a ton of blooms right now because I cut so many of them a few weeks ago. ;)
These are the mophead variety, and they have really strong, beautiful leaves too:
The leaves on that pink plant are especially hardy, dark and pretty.
Tip two – they do best in morning sun and afternoon shade (or dappled shade). Mine in afternoon shade (these above) do even better than those in the back that get the dappled shade. If you are having problems getting yours to grow – try moving them to a spot where they’ll get some rest from the heat in the afternoon.
I found some PeeGee trees on clearance a couple years ago and was so excited – they are basically a hydrangea tree. The year I planted them they did great for the rest of that season, but last year they looked like butt, like the rest of mine:
Now, they are amazing!!:
They are both blooming and full and doing great.
Here’s the thing (tip three) – hydrangeas need MEGA water. I mean, it’s in their name. :) Last summer was the complete and total opposite of this one here in Indiana – super hot, drought conditions – it sucked. This year we had a really wet early summer and it’s helped tremendously.
I just watch my plants – if they start to wilt at all I know they need water. They need a lot of it, but watch how you water them too. I’ve got one mophead that has a fungus on the leaves (it hit one of my peonies too) because we’ve gotten so much rain. If you can, water them at the base of the plant (not with a sprinkler) so the water goes right to the roots and doesn’t sit on the leaves. (The fungus will not really hurt the plant so I’m cutting off those leaves and letting it be. If it had happened earlier in the season I would have used something on it.)
The Pee Gee tree is a paniculata hydrangea, like the limelight I first showed you. These two have the more cone shaped flowers:
I much prefer the big round blooms, but these are beautiful too. They turn the most beautiful pink/green in the early fall – they are just gorgeous! I used them in this post a couple years ago:
Aren’t they pretty?
I have about ten hydrangea plants out back now, and this one was my most recent addition:
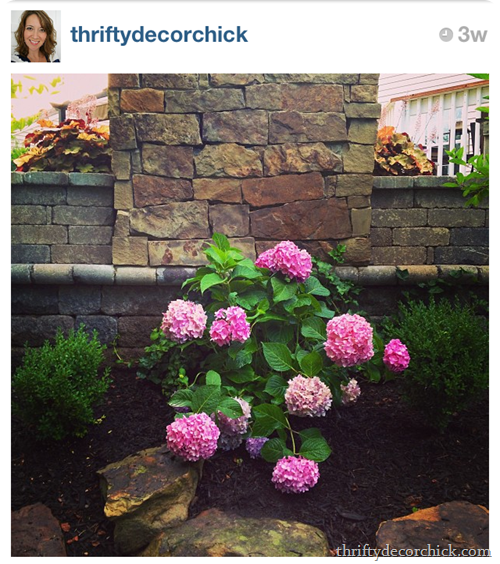
I shared it on Instagram – it was in full bloom when I got it and looked amazing! This plant was HUGE (I got it at a local nursery) and was $30 something dollars – you can find them half that size for the same price, so make sure to go big!
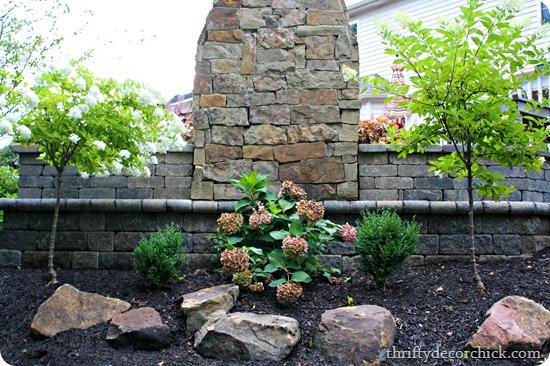
Those flowers are now done and are turning brown but the plant is doing great:
You can see my two PeeGee trees better here – they start to droop a bit as the blooms get bigger. (The one on the left is ahead of the other one by about a week.)
That brings me to another tip (number four?) – plant them in early summer or late fall if at all possible. It’s a lot of upkeep to keep them healthy and hydrated if you plant in the heat of mid-summer. I think the best time would be early summer so you can enjoy the blooms all season, but you can get some killer deals on them later in the fall, so it’s a hard call. I also think if you plant in the early summer you’ll have a better chance at a healthy, blooming plant the next year, since it has more time to get settled.
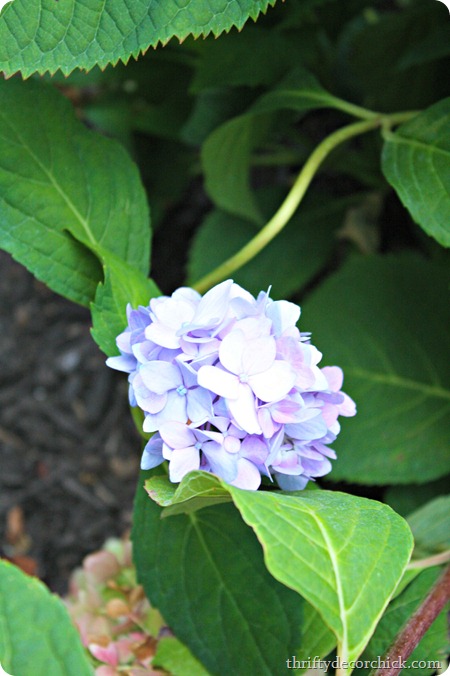
That huge mophead above was blooming pink when I bought it and the guy at the nursery said they will turn blue in our soil unless I changed the acidity. I have others that are blooming pink so I don’t know if it’s just this type? I was happy with that though because I have white, purple and pink and wanted blue:
He was right! ;) The new blooms are blue.
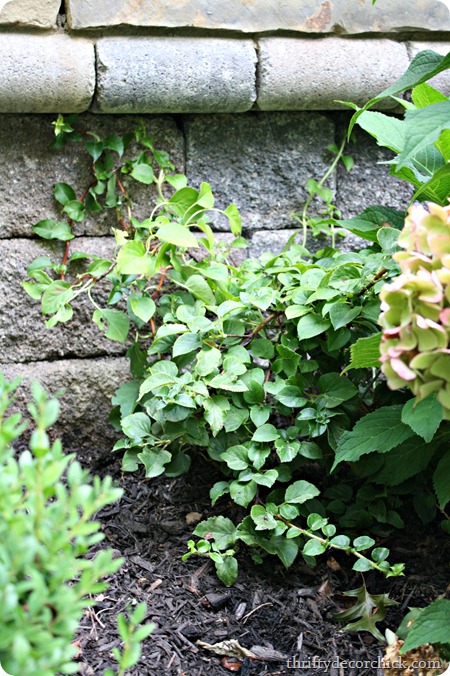
Behind that one is a climbing hydrangea I planted last year:
Again, the plant is doing great, but not a bloom in sight. It’s not going to bloom this year at all, I can tell. I’m moving that one to a different spot soon so we’ll see how it does there.
Around the corner from those are a few more – mostly mopheads and one surprise lacecap:
This is why you want them to be blooming when you buy. The lacecaps are more delicate – they have little bitty flowers that grow in the middle of the more traditional looking blooms. They are beautiful, but I just prefer the bigger fluffy ones. I am excited to see how these look when they are all blooming though!
Here’s my final big tip – I don’t prune my hydrangeas and they have done great this year. I mentioned earlier this year that I had pruned them and I misspoke a bit – I just (mostly) took all the dead wood off.
This can be tricky because sometimes it’s hard to tell between the normal and dead wood. Most hydrangeas bloom on dead wood – so you want to keep those ugly sticks like mine had last summer:
But I think it helped mine a ton to pull the dead wood out – they just shot up when I did that. I don’t know if it was just coincidence with the timing, but it seemed to help. I just pulled the dead stalks out of the plant – it will give easily if it’s dead. If it doesn’t, leave it.
I did trim down the Pee Gees just a bit though – just some of the tips that were total toast. And it seemed to work! I did this in May of this year – I’ve heard that’s a good time to do it if you’re going to. So I won’t cut them down this winter, and at best I’ll do a tiny bit of pruning next May, but that’s it. Otherwise I’ll leave them alone.
So that’s about it – I’ve learned a lot over the past year! I was determined because hydrangea are one of my all time favorites and I LOVE having them to cut and bring inside:
Mine still have a long way to go – most are still tiny compared to a mature plant. But they are doing SO much better than the past. I think I’ve finally figured out how not kill them! Bonus!
Here’s a few other tips:
- If your climate is too warm for hydrangeas, consider the Pee Gee tree. It loves full sun so it should do better for you.
- You can change the color of your blooms with some stuff from the nursery or hardware store, or there are DIY methods too. (I’ve heard nails, pennies, etc.) The color of your blooms depends on the acidity of your soil. (Other than the white ones – those can’t be changed.)
- It seems like they are high maintenance, but once established hydrangeas are easy to take care of – they just need WATER.
- You know those planted hydrangeas you find in the spring/early summer at grocery stores? Yeah, they aren’t really meant to be planted. I had no idea! Go here to read more about that. I still think my one plant that isn’t blooming may be one I got from the grocery that I planted years ago. If it doesn’t bloom next year I’ll replace it.
I hope that helps any of you who have struggled with growing this beautiful plant! Again, I’m no expert but I’m getting there. ;) I think the change I made that made the biggest difference was where I planted them – the afternoon shade is key, at least at our house.
Are you a hydrangea lover? Any great tips I’ve missed? Have you tried and failed at these?
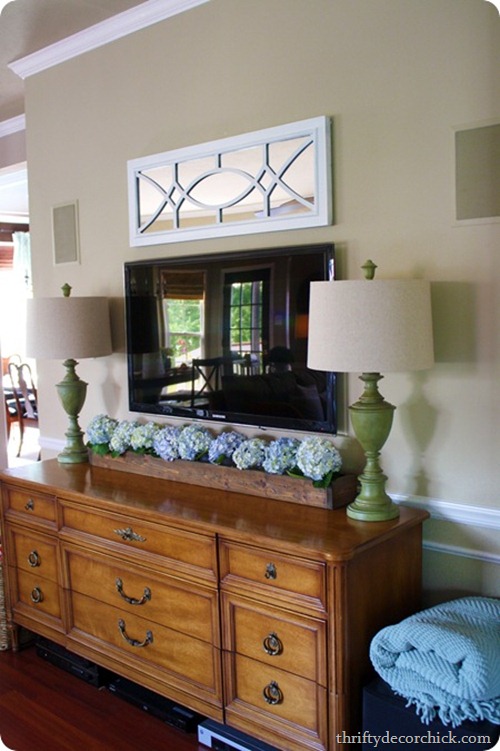
**For more on that DIY wood trough with the flowers in our family room go here!


